
Plaster Repair in Spring, TX: Lath, Keys and the Wall Behind the Finish | Spring Drywall Co.
Spring Drywall Co., a full-service drywall contractor, handles plaster repair on older walls around Spring, TX, and that work ends where the plaster ends: we repair the plaster itself, not the gypsum board installed beside it. Plaster almost never fails at the surface you see. The failure is behind it, at the plaster key, which is the grip that holds the plaster to whatever sits behind it. If the key has failed, filling the face alone will not hold, and the patch comes back because there is nothing underneath supporting it.
Lath and plaster, veneer plaster and textured drywall can look much the same after they are painted, but they are three different wall systems and each takes a different repair. Telling them apart is where every plaster repair price starts, and most houses around Spring turn out to be too new for lath and plaster at all. Where board work meets the same wall, we follow ASTM C840, the standard that governs how panels are fixed to the framing.
We have spent 15 years working on walls and ceilings across Harris County and Montgomery County, and every plaster wall repair starts with identifying exactly what your wall is made of. Before you book, we also explain that new plaster needs about 30 days before it can be decorated. Call us at (936) 286-6045 or request a visit for a free on-site look and a written scope.
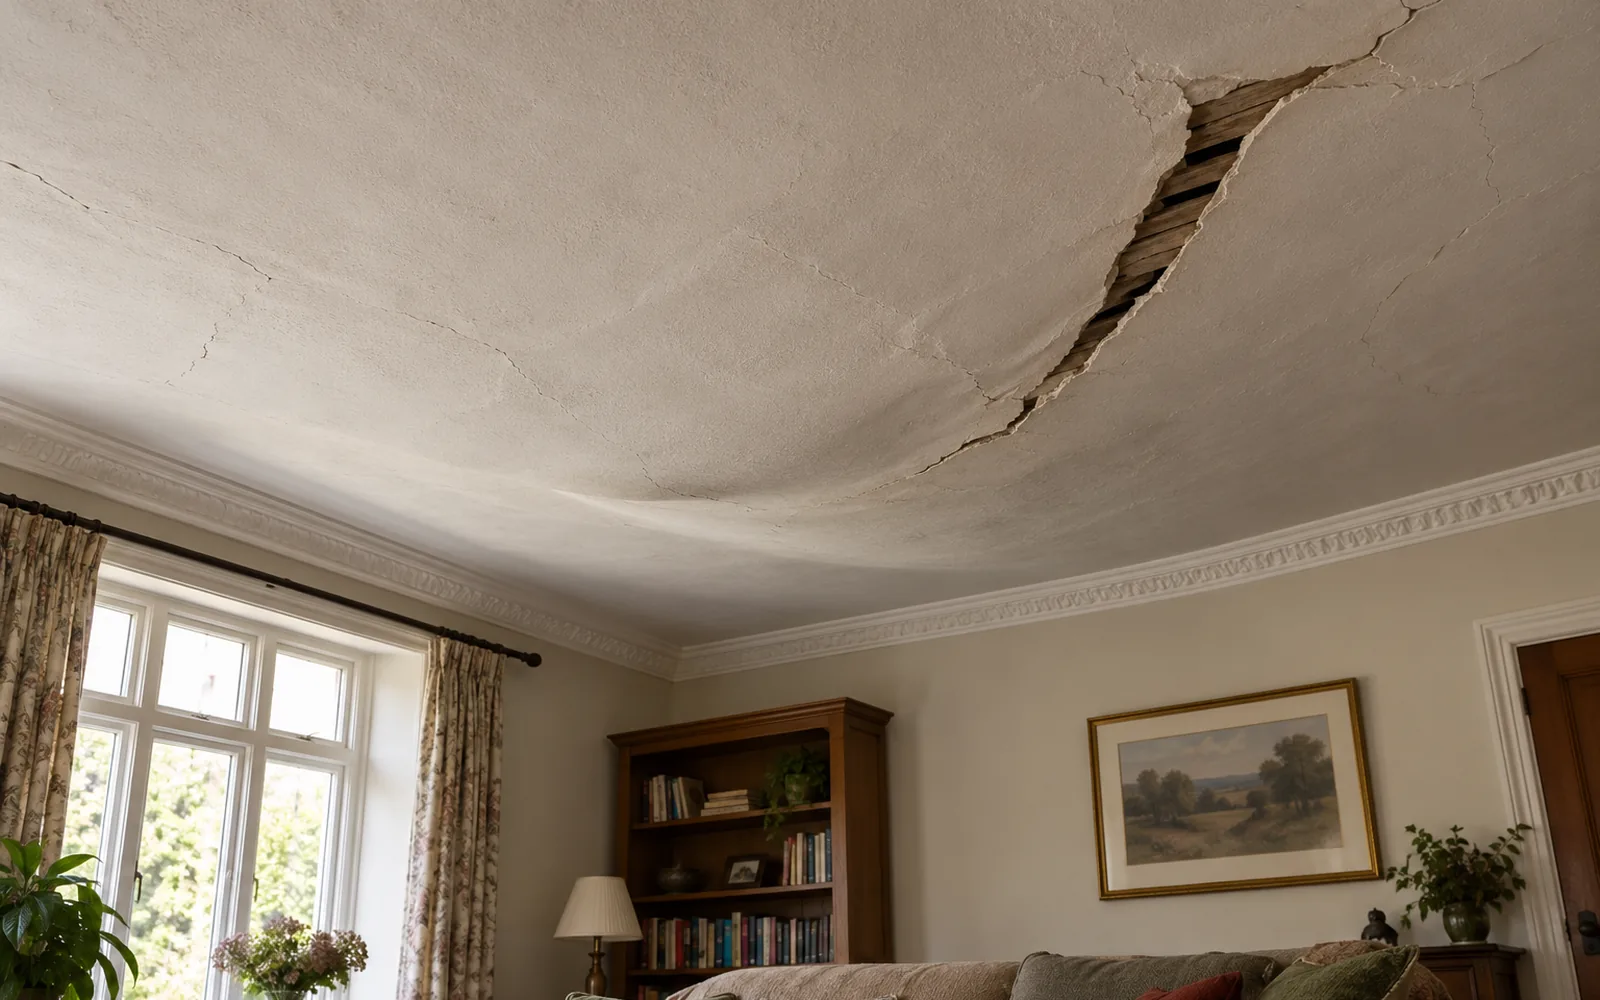
Telling Plaster From Drywall Before You Book a Repair
Plaster repair starts with a question that sounds simple but rarely is: what the damaged wall is actually made of. Most housing around Spring, TX was built after plaster had fallen out of regular use, and the median home in Harris County was built in 1988, so when a caller says plaster, they are usually describing the surface rather than the wall material itself. Genuine wet plaster over strips of lath still survives in older areas and in pockets of Tomball and Humble. Whether your wall is plaster or drywall determines the repair method, the material and the price, so we identify it before anything else.
The Three Walls People Call Plaster
Three different wall systems get called plaster, and only two of them actually contain it. Lath and plaster is the oldest: wet coats troweled over thin wood strips, or over the rock lath panels that later replaced them, with the finish built up in layers. Veneer plaster is less familiar. It is real plaster applied in a much thinner coat over blueboard, a panel made specifically to receive it. Those systems developed through the 1960s and 1970s as interior gypsum plaster was losing market share, and by the late 1970s that market had largely ended.
Textured drywall is the common answer here: gypsum board finished with a sprayed or troweled pattern such as orange peel. The pattern is only the surface finish. Plaster is the wall material itself.
Reading Your Own Wall in a Minute
You can identify a plaster wall yourself before we come out, because the wall thickness gives you a clear answer while knocking on it only tells you that something sounds different. Turn the power off at the breaker, unscrew a switch plate, and look at the cut edge where the full depth of the wall is exposed; an outlet box gives you the same view.
A thin wall with one clean layer is gypsum board. A noticeably deeper wall, with separate coats you can see, is traditional plaster. Board thickness with a hard plaster skin over it is veneer plaster. The section below gives the figure for each. A dull patch that gives slightly under your hand is a released field: an area of plaster that has separated from its backing but is still standing. Sound is only a supporting clue, because we are listening for where that released area ends and you are not.

What Plaster Repair Covers
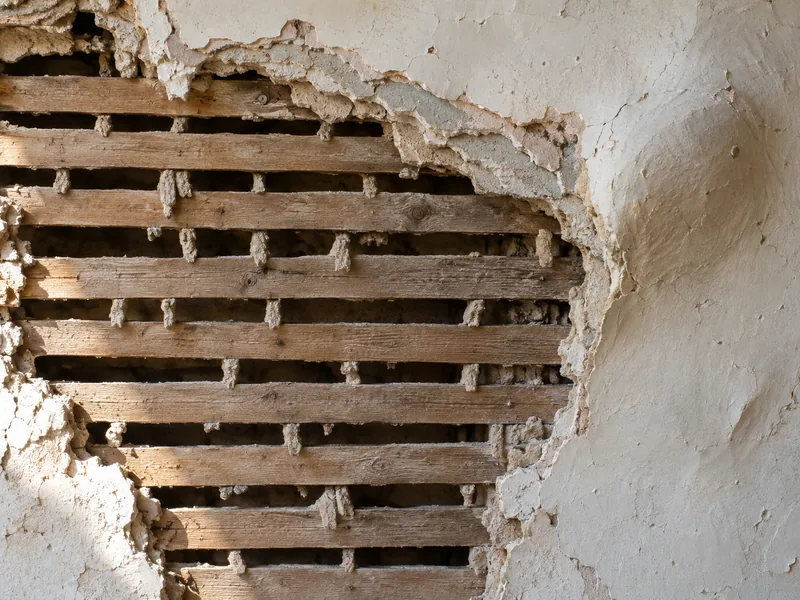
Plaster repair fixes the hard, troweled material that forms the wall itself, along with the lath behind it that holds the plaster in place. Three jobs that can look similar from the doorway fall under other services here. A patch in gypsum board is drywall repair, retexturing a whole room is finishing and texturing, and tracing where water is getting in is part of our water-damage work. The plaster repair services below cover failures in the plaster substrate, whether that means plaster wall repair at eye level or plaster ceiling repair overhead.
Cracks That Keep Coming Back
A fine network of hairline cracks across a wall comes from the finish coat drying and aging, which means the plaster itself is failing. Cracks in plaster walls of this kind are cut open, filled and re-finished so they stay closed.
A single crack running at roughly forty-five degrees up and away from the corner of a door or window is different, because that angle shows the opening is being pulled out of square. Spring sits on Beaumont Formation clay, which swells when it is wet and shrinks when it dries, so the ground beneath a slab here is never completely still. Plaster crack repair on a moving crack uses a repair built to move with it, and we make it clear that stopping the movement itself is foundation work, not ours.
Hollow Areas Where the Plaster Has Released
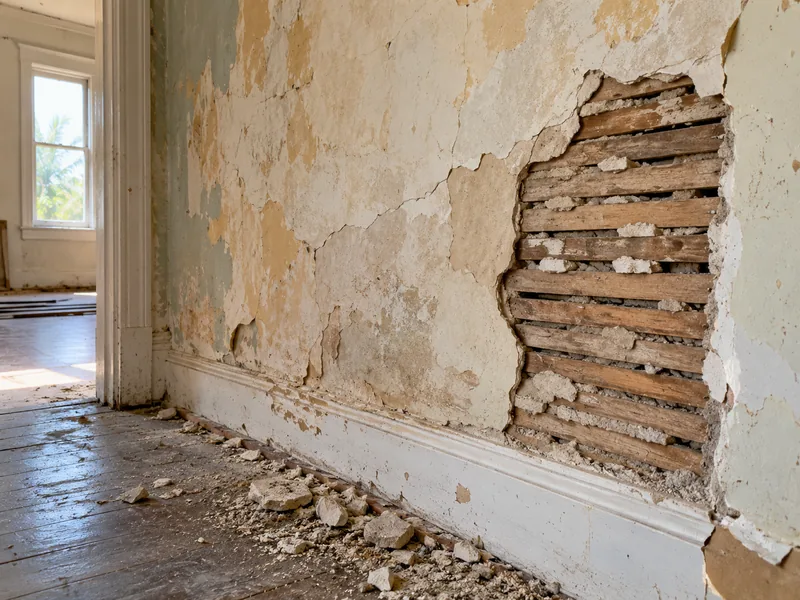
Loose plaster has separated from the lath behind it and is left standing without support. The face can stay flat and painted even with a square foot or more of empty space behind it, so the main signs are a dull note when you tap it and a slight give under your hand. Ceilings show this first and most clearly, because a ceiling hangs its full weight from that grip while a wall mostly stands on itself.
Filling a crack does not reattach plaster that has already separated from the lath. Delaminated plaster has lost its support, not just its surface. We pull the loose field back against the lath and secure it there before any filler is mixed.
Holes and Missing Sections
Holes come from door handles hitting the wall, from towel rails or cabinets being removed and leaving their fixings behind, and from access cuts made by a plumber or electrician to reach pipe or wire that were never closed afterward. Plaster hole repair is different from filling a hole in gypsum board because plaster is substantially deeper, so the opening has to be rebuilt in coats, and the cut edge keeps breaking away as you work it.
We cut the perimeter back to firm material, check that the lath behind the opening is sound or renew it where needed, then patch plaster wall openings in successive coats until the original depth is restored. Popcorn texture or other suspect material is tested by a qualified asbestos professional when its age or condition warrants testing before disturbance, and we scrape only material the results clear as safe.
Rooms That Are Half Plaster, Half Board
Many older houses have walls that are plaster along most of their run and gypsum board for the rest, usually from an earlier repair or a room added later. Gypsum board is markedly thinner than the plaster it meets, so one surface either stands proud of the other or sits back from it, and the two materials also swell and settle at different rates as indoor humidity rises and falls through the year.
Drywall over plaster that is simply taped at the seam will split along that seam within a season or two. We build the board out to meet the plaster plane, then bridge the plaster to drywall transition with a compound that sets hard rather than merely drying, so the junction stays together.
What Is Behind Your Plaster, and How It Holds On
Plaster is a wet material that hardens against a plaster base, which is fixed across the framing, the wooden skeleton of studs and joists inside your walls and ceilings. The type of base determines how the wall fails and where we place fasteners to pull sound plaster back tight. Two bases account for almost every plaster wall people ask us about, and each produces a different wall thickness, which is the third thing worth knowing. Identifying what is behind plaster walls is the first measurement we take.
Wood Lath and the Grip That Fails First
Wood lath is the oldest of the lath types and holds plaster by grip alone, without adhesive or a chemical bond. It consists of narrow wooden strips, roughly a quarter inch thick and four feet long, nailed in rows across the framing with a deliberate gap of about three-eighths of an inch between them. When the first coat was troweled on, it was pushed through those gaps and spread behind the strips, where it hardened into ridges that hooked over the back of the wood. Those ridges are plaster keys, and they provide the entire anchorage for a wood lath plaster wall.
Plaster keys break when slamming doors, footsteps overhead, roof leaks that soak the wood, and the slow sag of old framing work the hardened ridges back and forth until they snap behind the surface. The face of the wall does not change when that happens, so the plaster can still look intact even though it is left resting on friction and its own weight.
Rock Lath, and the Different Way It Lets Go
Rock lath replaced wooden strips with sheets. Each sheet is a gypsum panel three-eighths of an inch thick and sixteen inches by forty-eight, nailed directly to the framing and then covered with plaster. It went up in a fraction of the time wood lath required, which is why it became the standard way to build a plaster wall and why most of the gypsum lath plaster we repair sits on rock lath rather than strips. It also changed the build-up: a sheet base takes two coats where wood strips take three, so the plaster over it runs about half an inch thick instead of seven-eighths.
The sheets come in two grades, and both are made to hold plaster. Perforated sheets have holes that let the basecoat push through and harden behind them. Plain sheets use a treated face paper that the plaster bonds to directly. In either case, the sheet itself hangs from its nails, so a failing wall of this type shows movement at those fastenings or splitting within the plaster coats rather than a loss of grip at the surface. That is why our screws pass through the plaster and the sheet and into the framing behind, which is what carries the load.
How Thick Plaster Should Be, and What Thin Means
Over wood lath, plaster was built up in three coats to a total thickness of about seven-eighths of an inch, and ASTM C842, the standard covering the application of interior gypsum plaster, is the measure for that build. The scratch coat goes on first at roughly three-eighths of an inch and forms the keys. The brown coat adds another three-eighths of an inch and brings the wall flat and true. The finish coat is the final eighth of an inch, forming the smooth white surface you see and touch. Veneer plaster is a different system entirely: a thin plaster skin over board, measuring a sixteenth of an inch in a single coat or three thirty-seconds in two coats.
The thickness at your switch plate tells us which system you have: about half an inch of plaster points to a sheet base, while nearer seven-eighths points to wood strips. That measurement is not arbitrary. If a wall is well short of the thickness its system should have, material has been lost, usually during an earlier repair that removed more plaster than it put back. Plaster thickness determines how much depth we need to rebuild, which in turn determines what we mix and what the repair costs.
How Plaster Repair Puts a Wall Back
Plaster repair follows a fixed order: first the wall is anchored, then it is rebuilt, and finally it is matched. Anchoring pulls loose plaster back tight against the material behind it, rebuilding restores the original depth, and matching brings the new work level with the surrounding surface. We do not fill anything until the wall is holding itself again, because material applied over plaster that is still moving will come away with it. Each stage uses a different material, and skipping one is why the same crack or hollow area returns a season later.
Anchoring the Field Before Anything Is Filled
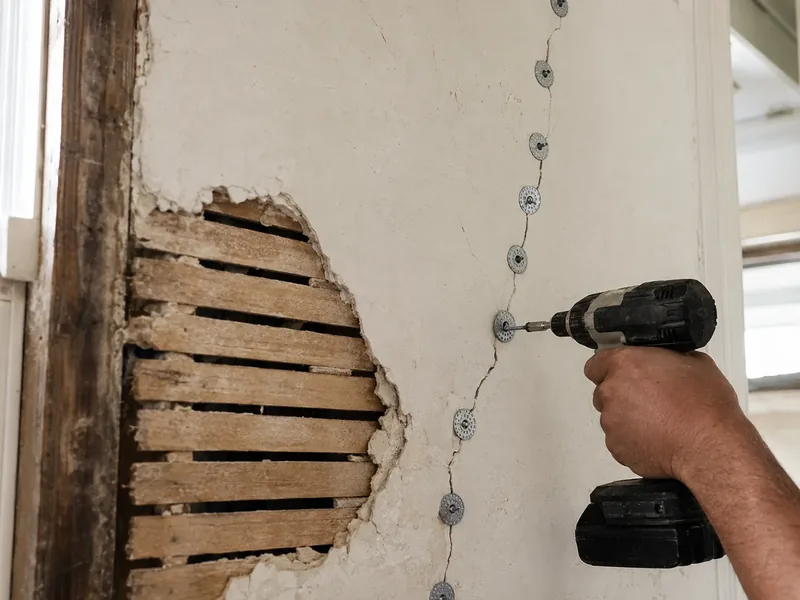
This step has to leave the loose plaster firmly fixed to what is behind it, and it is the part most repairs miss. We press across the wall to find where the sound plaster ends, then map the released area out to those solid edges. The key question is how far the loose section actually extends, which is usually beyond the damage you can see.
To reattach plaster to lath, we use plaster washers, small perforated metal discs that sit under the screw head. The perforations let later material grip through them, while the disc spreads the pull of the screw over a wider area so the head does not sink through plaster that has gone soft. The screws reach the framing itself, or the lath where the lath is still firmly held. We draw the loose field back until it is flat and stop there, because driving it past flat will crush the plaster. Plaster that is too broken to pull back is cut out and replaced rather than reattached.
Building the Depth Back
The opening now has to be rebuilt to its full depth with material that will hold that depth permanently. Premixed lightweight compound made for drywall seams is not suitable for that job because it hardens by drying, so it shrinks as the water leaves and moves as the humidity in the room rises and falls. In a deep opening, that movement shows through the paint as a shadow or ring.
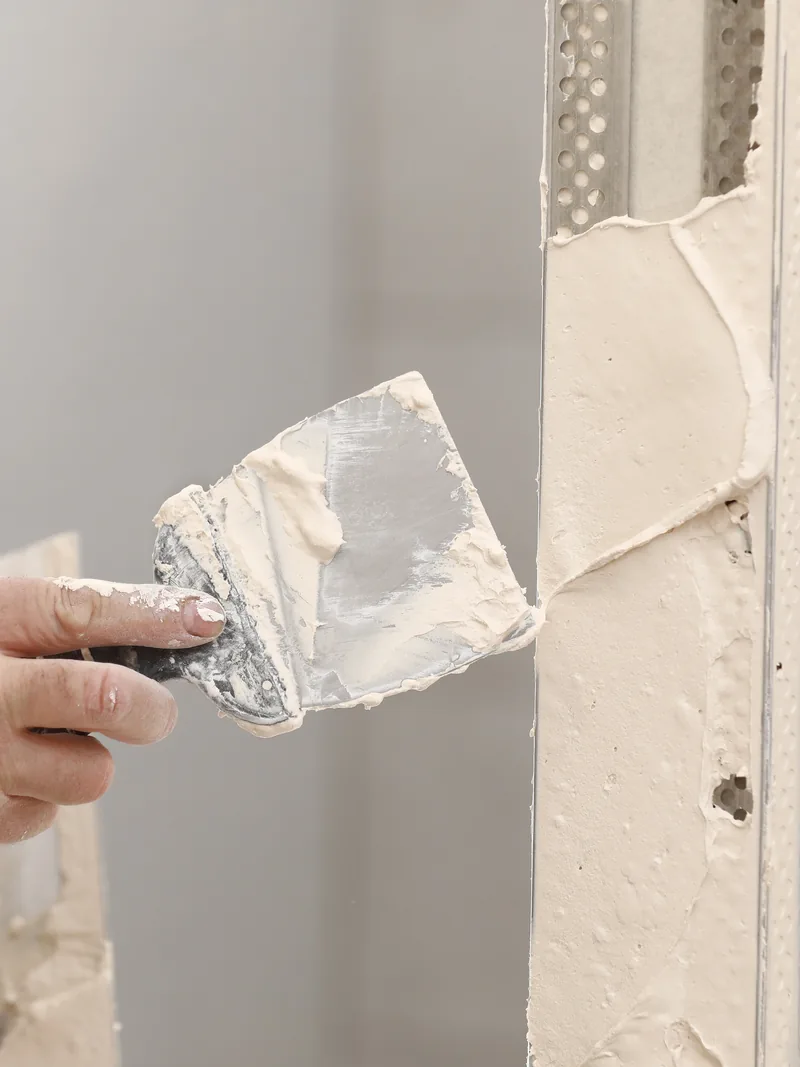
We use a plaster basecoat instead, mixed with perlite, a light volcanic aggregate that keeps the body of the fill stable, then finish the build-up with setting-type compound. Both harden by chemical reaction rather than by drying, so each coat holds the depth at which it was applied. Where the old surface is too dense to grip, we brush on a bonding agent, a liquid that gives the new material something to hold to. Each coat keys into the one beneath it, and the depth of the opening determines how many coats are needed.
Matching the Plaster Finish
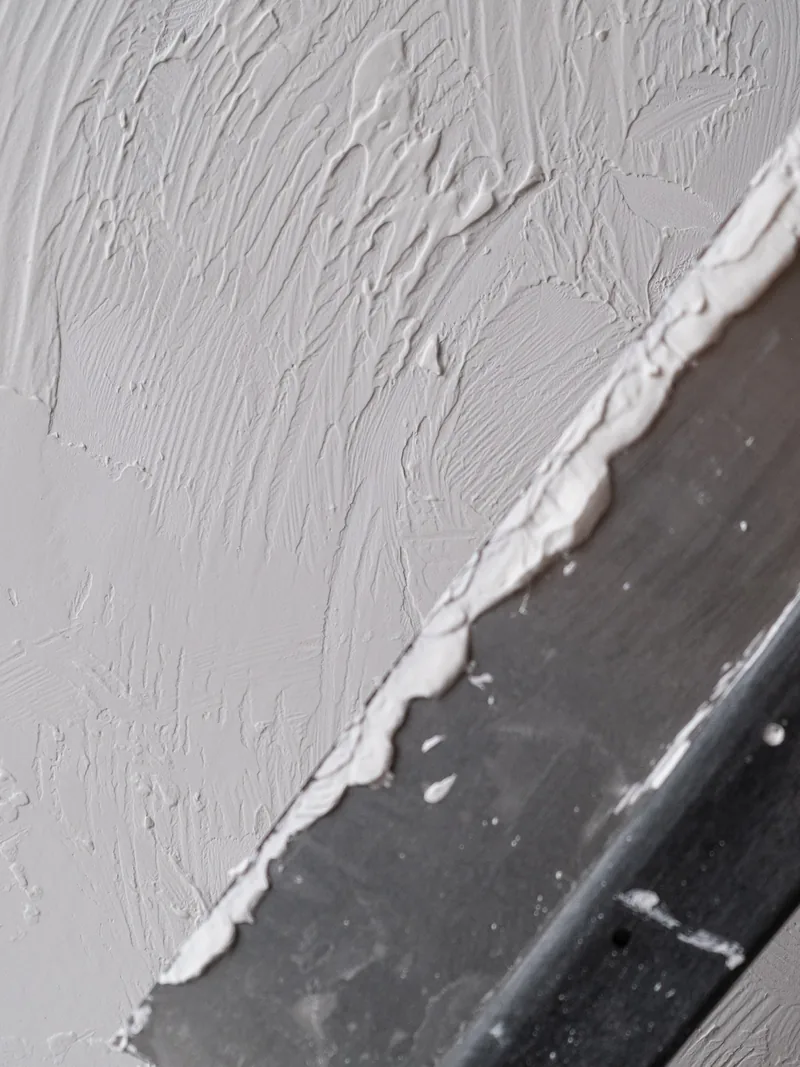
The repair is finished only when the new surface blends into the old one. A plaster finish coat is troweled, spread and flattened with a steel blade rather than sprayed, and an older troweled surface has a particular flatness and faint sheen that a sprayed coating does not produce. To match plaster finish work, we have to reproduce both.
We judge the match in raking light, with a lamp held close to the wall and angled across it, because shallow light shows every ridge and hollow that direct light hides. The plaster skim coat, a thin finishing layer, is carried out to an inside corner or another natural break in the wall instead of stopping at an arbitrary line across open plaster, so the transition does not stand out. Decorative pattern work across a whole room is a separate job and is not part of this repair.
What Plaster Repair Costs Around Spring
A single crack or a patch the size of a dinner plate runs $300 to $650, while a wall with plaster released over a broad area that needs re-anchoring and skimming runs $900 to $2,500. Those plaster repair cost figures are higher than what we charge for the same work in gypsum board because plaster takes more time, not because of added markup. Plaster is built up in wet coats that have to set before the next coat goes on, so the same square foot requires more work and more time between visits.
Most of the price is labor, with material making up only a small part. Plaster ceiling repair sits at the top of both ranges. We can narrow either range to a firm price only after we have seen the wall or ceiling.
What Moves the Price on a Plaster Repair
Five things separate a job at the bottom of the range from one at the top, and the wall itself gives us most of the answers.
- Depth. The thicker the original plaster, the more material we have to rebuild.
- How far the released field runs past the damage you can see.
- Ceilings, which cost more than walls because the work is overhead and the plaster's weight works against us.
- An unusual troweled finish, which takes more time to bring level with the surrounding surface.
Those plaster repair price factors are why the cost to patch plaster depends on the condition of your wall rather than simply the length of the crack. Call us at (936) 286-6045 and we will come out and look at the wall.
How Your Plaster Repair Runs
The plaster repair process starts before we arrive at the house. Send us photographs of the damaged area and, if a piece has already broken away, one close photograph of the exposed edge where the old material is visible. Those two views tell us a great deal about what we are dealing with and help us arrive prepared instead of guessing. From there, the work moves through four stages, and you are there for the first and the last.
-
1
You send photographs of the damage and one close view of a broken edge.
-
2
We visit, test the wall and provide a line-itemed scope of the work.
-
3
We seal off the room and complete the repair.
-
4
We walk through the finished repair with you and tell you when it is ready to be painted.
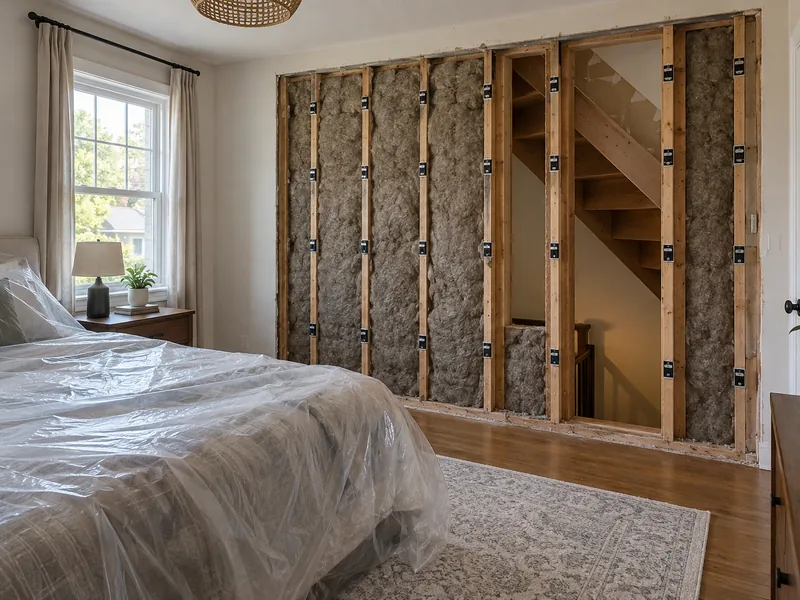
The visit and written estimate cost you nothing, and every line item names a specific piece of work instead of giving you one lump sum. Once the repair starts, plastic barriers and sealed doorways keep the dust inside the room we are working in, so the rest of the house stays usable. When the work is finished, we walk the wall with you in the room's normal light and explain what we found and what we repaired before the job is closed. Nothing about your wall is decided without being explained to you.
Call Spring Drywall Co. at (936) 286-6045 or use our quote form to request a plaster repair quote.
Plaster, Humidity and When the Wall Can Be Painted
Plaster hardens through a chemical reaction that is separate from losing water, and that reaction finishes well before the moisture has left the material. Hardening is the cure; the slower loss of mixing water afterward is the drying stage. Both have to be complete before the repair is decorated, and drying takes longer.
Spring has a humid subtropical climate on the Gulf Coast, where the air already holds a great deal of moisture, and damp air draws water out of a wall much more slowly than dry air. A repair made here takes longer to become ready for paint than the same repair in a dry climate, so plaster drying time needs to be part of your schedule from the start.
Why New Plaster Waits Before It Is Decorated
A basecoat, the thick layer that builds the wall back to its full depth, can set within hours and feel solidly hard to the touch that same afternoon. That hardness does not mean it is dry. United States Gypsum, whose guidance covers finish plaster applied over a conventional basecoat, puts plaster curing time at roughly 30 days of aging and thorough drying before it is decorated.
The wait matters because paint laid over plaster still giving off moisture traps that water behind the paint film, which leads to blistering or an uneven, patchy sheen. How long your repair needs depends on its size: a small patch surrounded by dry wall loses moisture faster, while a rebuilt area covering several square feet holds it much longer. Once the wait is over, we prime the repair so the fresh surface absorbs paint at the same rate as the wall around it and the finish coat dries evenly. That is the practical answer to when to paint new plaster.
Proving the Plaster Has Dried
Instead of relying only on the calendar, you can test the wall itself. Tape a twelve-inch square of clear plastic flat against the surface, seal all four edges, and leave it in place overnight. If condensation appears underneath after 24 hours, the plaster is still releasing moisture and is not ready for paint. If the plastic stays clear and dry, the plaster has finished drying.
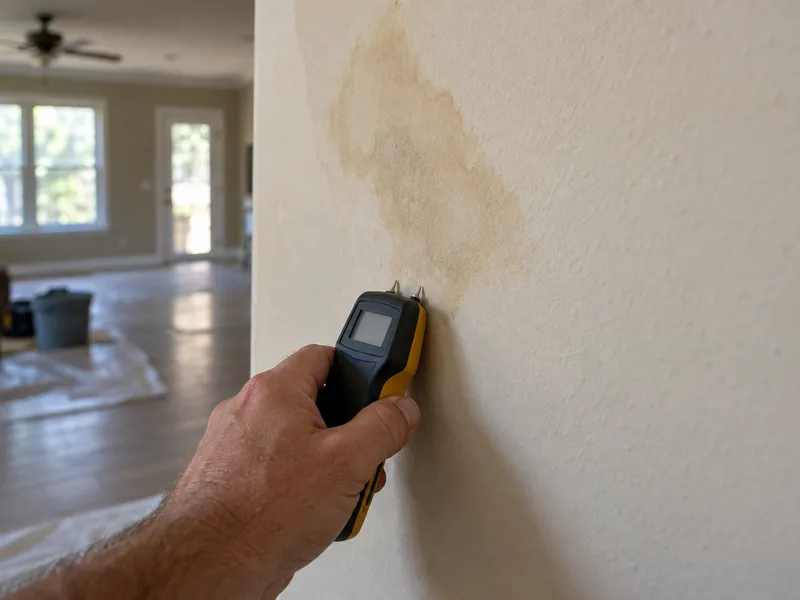
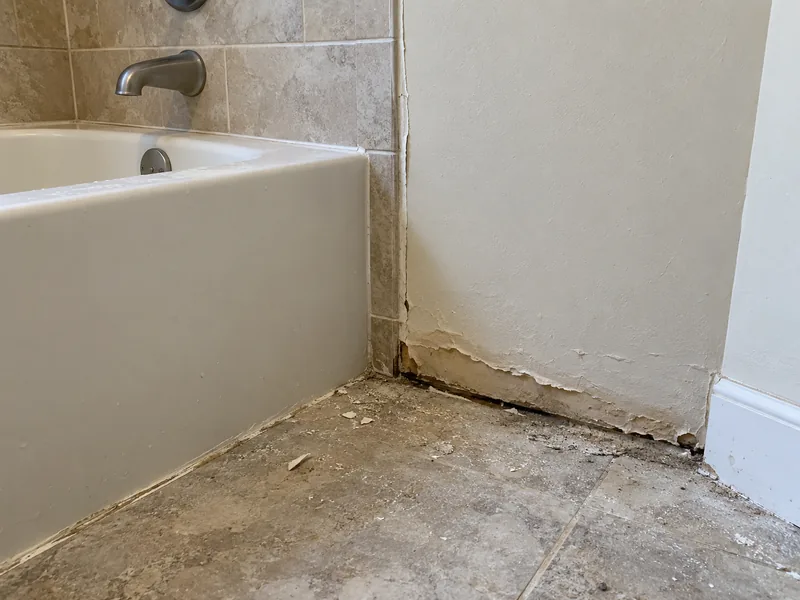
Where a wall has been wet, we check it before sealing anything back up. We compare the exposed framing and surrounding materials against dry reference readings before closing the wall. A moisture check also tells us what condition the material behind the surface is in. When mold reaches past a small, contained area, Texas licenses that assessment and remediation work, so a licensed mold professional handles it first.
Why Choose Us
Why Choose Spring Drywall Co. for Plaster Repair
Plaster requires different materials, a different repair sequence and a different timetable from board work. The sections below explain what those differences mean for you rather than for the crew doing the work. We are an insured drywall contractor, and our crews work to ASTM C840 for how gypsum panels are hung and fastened and to GA-214 for finish levels.
On every plaster job we handle:
- Loose plaster is re-anchored before any filling begins.
- Dust containment for an occupied room is included rather than charged as an extra.
- The wall system is identified before we price the repair.
- The written scope separates each repair item so you can see exactly what it covers.
- You are given the decorating date before the work starts.
Call us at (936) 286-6045 to arrange a look at your wall.
Plaster Repair Across Spring and the Surrounding Communities
Plaster repair follows the age of the housing stock, which around here means the older town centers rather than the newer subdivisions. About one Harris County home in twenty was built before 1950, and those are the houses where hard, troweled plaster still sits behind the paint. The same pattern continues through older parts of Montgomery and Waller counties, so two houses only a mile apart can have completely different wall systems under the surface. We work on both types of house and cover every community below, whichever wall system you have.
Where Spring Drywall Co. Takes Plaster Work
Spring Drywall Co. provides plaster repair across Spring and the surrounding communities of north Harris and Montgomery counties, and west into Waller County:
- Tomball
- Klein
- Shenandoah
- Oak Ridge North
- Porter
- Humble
- Aldine
- Westfield
- Bammel
- Champion Forest
- Willowbrook
- Jersey Village
- Cypress
- Hockley
- Waller
- Magnolia
- Pinehurst
FAQ
Questions About Plaster Repair
How much does it cost to patch plaster?
Most small plaster cracks and patches run $300 to $650. Larger released areas cost more because the plaster around the visible damage also has to be re-anchored and rebuilt.
Can plaster be repaired?
Almost always, and usually without replacing the wall. What matters is how much of the plaster is still firmly attached behind the surface, not how severe the visible damage looks. A wall covered in cracks can be the easier of the two repairs. We determine which condition you have during the visit before quoting a price.
How do I know if my wall is plaster or drywall?
Measure the wall's thickness at a switch plate using the method described further up this page, because the three systems sit at clearly different depths and nothing else separates them as reliably. If you would rather not remove a cover plate, send us a photograph of any broken edge where the wall material is already exposed and we will tell you what you have before we visit.
Why does the same crack keep coming back?
There are two reasons, and filler solves only one of them. A crack filled over a released field opens again because the filler was never the part that failed. A crack running at roughly 45 degrees off a door corner comes from the house moving on expansive clay, and it returns because the wall keeps being pulled.
How long before a plaster repair can be painted?
Drying time depends on the material used, the depth of the repair and the size of the area that was rebuilt. Once the final coat is complete, we give you the date when the repair will be ready to decorate.
Get a Written Price on Your Plaster
A plaster repair quote from Spring Drywall Co. starts with an inspection of the wall itself. We come out at no charge, identify the wall system and determine how far the damage extends before putting a price to the work. You receive a written scope with each part of the repair priced on its own line, so you can see what you are paying for before you agree to anything. Call (936) 286-6045 or use our quote form for a clear, written price on your project.